What makes a snapshot a photograph?
Making a snapshot a photograph starts with understanding the difference between the two. A snapshot is typically defined as a photo that is "shot" spontaneously and quickly, most often without artistic intent. Snapshots are commonly technically "imperfect" and seem amateurish, out of focus, poorly framed or composed.
The cycling community is not immune to the “snapshot” either, quite the opposite as it seems that a quickie is all that one needs to document their ride. We have all seen the preverbal “bike selfie”! Just look at most cycling social sites or profiles of someone who owns a bike (and actually rides it) and you’ll see their bike far off in the distance of some sweet place unknown!
So why do some of the photos get 10, 50 a 100 likes and other 1 or 2? In most cases, it’s because they are NOT snapshots but thoughtfully thought out photographs. Whether by accident or deliberate – some basic photography rules were applied. Here I will go over a couple of them.
Know the Basic Rules
While I’m not always a fan of sticking strictly to the rules of photography I don’t believe that you should be allowed to break them if you don’t know how to apply them. So here are 5 basic rules that you should keep in the back of your mind the next time you pull out your camera. Try them one at a time, or mix a couple together to see the different results.
Diagonal Lines & Rule of Thirds
1. Diagonal Lines: Using diagonal lines can be a very effective way of drawing the eye of those viewing an image into it and to the main focal point. The lines need not be actual lines – they could be the shape of a path, a line of trees, a fence, river or any other feature in an image. Converging lines (two or more lines coming from different parts of an image to a single point) can be all the more effective.
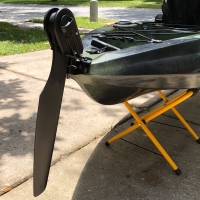
2. Get In Close: Very often we hesitate to get in close with our subject but we also have to realize that details are very important. The best way to show details is to get up close and personal. Don’t be afraid to really push it and even get close enough the parts of the subject get cut off. Whatever you are shooting, try experimenting with getting closer and closer, past the point where you are comfortable and see what happens.
3. The Rule of Thirds: The Rule of Thirds gets trotted out more often than any other in all types of photography and is one of the first rules of composition taught to most photography students. While sometimes it can feel a little cliche it can also be a very effective technique in landscapes (although keep in mind that breaking this (and other rules) can also produce dramatic and interesting shots). Position key points of interest in a landscape on the intersecting point between imaginary ‘third’ points in an image and you’ll help give your image balance and help those focal points to really capture attention.

Using Nature as your Frame & Fore, Middle & Background
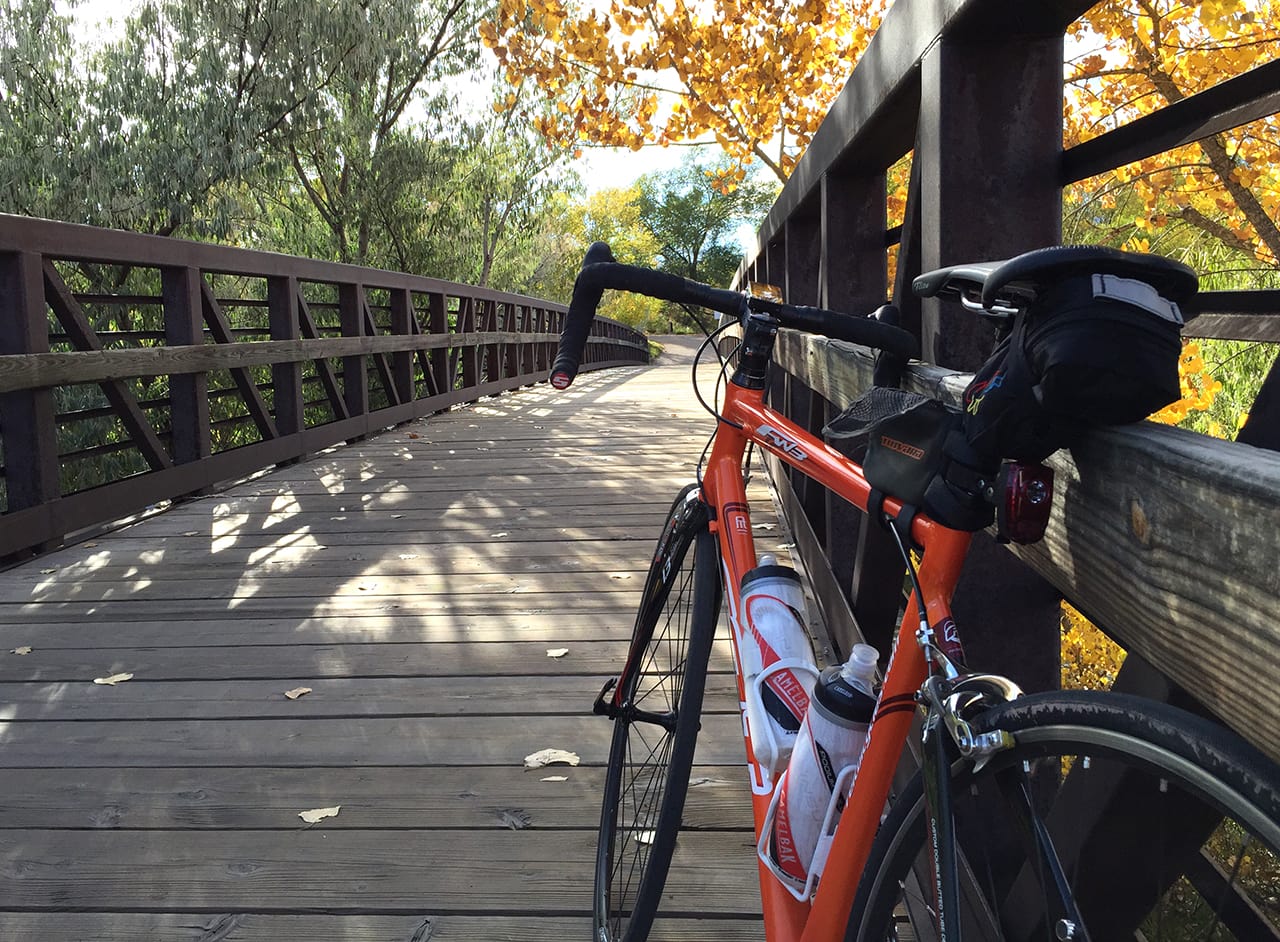
4. Framing Images: While adding points of interest to a foreground is an important technique for adding interest to landscape shots – a similar technique is to ‘frame’ the shot by adding interest to other parts of the edges of an image. Perhaps the most common way of framing a landscape shot is to include an overhanging branch in the upper section of a shot. Similarly framing a shot with a bridge might work.
5. Foreground, Middleground, and Background: A photo can generally be divided into these three planes. The foreground of a composition is the visual plane that appears closest to the viewer, while the background is the plane in a composition perceived furthest from the viewer. The middleground is the visual plane located between both the foreground and background. Seems simple enough, but the scale of these components often correlates to the dominant subject in an image. The foreground is often the most dominant due to the larger perceived scale of the images objects.
Examples with Rules Applied

Fore, Middle & Background

Fore, Middle & Background

& Get In Close


To achieve a strong composition, try to feature your bike in the foreground or middle ground as the subject placing it in a way that it compliments the other elements throughout the frame, this could be in appearance, color or maybe by their association to each other. Try not to dominate the foreground. A wider angle helps to accentuate foreground and create shots full of impact. But unless you are careful, the foreground subject will dominate the remainder of the frame and throw the composition off balance.
It’s will not take long for you to start shooting with these rules in the back of your mind. They will become second nature to you and if you take a moment on the trail to apply at least one – you should quickly see an improvement in your photos (and likes).
Take a look at the flowing photos – I have labeled them with the rules that I applied when I took these.
Resource Credit:
Digital Photography School: http://digital-photography-school.com
Camera Dojo: http://cameradojo.com
Adam Burton Photography: http://www.adamburtonphotography.com
2 Foundations: http://2dfoundations.wikifoundry.com