
DIY Energy Bars anybody can make!
A competitive cyclist’s relationship with food can be summed up in one word: intense. Our love of food runs deep and plays a role in almost every aspect of cycling. A hearty meal is the reward for a long day in the saddle. Enter DIY Energy Bars!
Even my recovery rides revolve around food, with restaurants being frequent destinations—taco stands in Tucson, falafel joints in New York City, barbecue in North Carolina, and coffee shops everywhere else. I recently ate pizza at 9,000 feet up on top of Mt. Lemmon.
At other times, though, food is an evil temptation, a source of stress and frustration. But above all, food is fuel.
When I got serious about cycling, I’d hit a wall whenever my rides went over three hours. I thought it was simply the upper limit to my endurance, that my fitness went only 180 minutes deep. What I didn’t realize is that while aerobic exercise taps into your body’s stored sugar (glycogen), the fuel available is limited. Your body has only enough stored sugar on hand to sustain one or two hours of vigorous exercise, and my one bottle of Gatorade couldn’t carry me much farther than that.
In other words, if the journey’s long and you don’t fill up your tank, you’ll run out of gas.
The ceiling disappeared as soon as I began paying attention to my food intake and eating deliberately. Suddenly I could charge right through the three-hour mark, so long as I consumed the needed calories.


My recent training rides—typically over 4 hours and 50-60 miles—have been sustained by homemade energy bars. Rather than rely on a single recipe, I follow some basic guidelines and came up with a unique batch each time.

 Save to BigOven
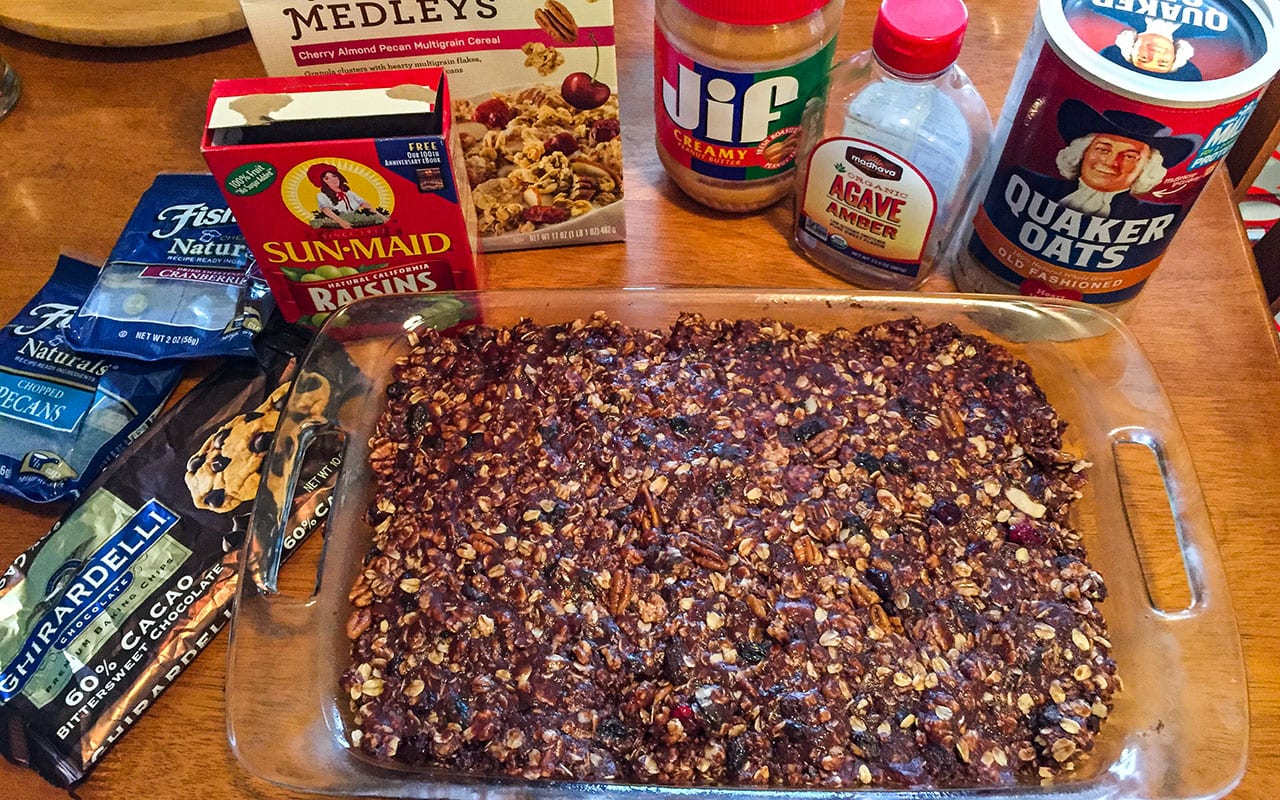
A mix of simple sugars (anything sweet) and complex carbs (whole grains, oats, and so forth) is ideal. Since the first offers up a quick energy boost while the latter is a long-lasting fuel source. Sodium and potassium are crucial, too, but it's easy to cover the bases if you eat a variety of food. Piece of cake, right?
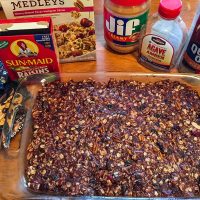
Ingredients
- 4 cups Quaker Oats
- 4 cups Quaker Real Medleys Cherry Almond Pecan Cereal
- 1 cup Fisher Chef's Naturals Pecans
- 1 cup Sun-Maid Raisins
- 1 cup Ghirardelli Bittersweet Chocolate, 60% Cacao
- 1 cup Fisher Chef's Naturals Cranberries
- 1 cup Market Pantry Dried Sweetened Cherries
- 2 cups Amber Agave Syrup
- 2 ½ cups Jif Peanut Butter - Creamy
- Salt to taste
Instructions
- Heat the sweetener and peanut butter over medium heat
- Combine and mix the remaining ingredients in a large mixing bowl
- Stir in the heated sweetener mix
- Pour into a large square 8 x 12 pan
- Let it cool
- Slice into 2-inch-by-2-inch squares
Notes
- Slice each batch up into 2-inch-by-2-inch squares and wrap in wax paper.
- Each square delivers about 475 calories with 65 grams of carbs, a perfect dose of energy for 60 active minutes on the bike.
- These are great for kayaking and hiking as well.
- If you're a cash-strapped bike racer, maple syrup if you live in New England, or brown rice syrup if you shop at Whole Foods.
- Let's not discount the obvious! You can add or replace any of the above ingredients with your favorite choices!


The concept sounds good but can you actually post a recipe to take the guesswork out of it? Thanks in advance!
Chris, I am very sorry for this! The plugin Developer made some major changes a couple of months ago and the software keeps failing. I have reinstall the stable version and it is now working again. Thank you for letting me know!
Awesome! Take control of your intake! Buying 40 tigers milk bars every month is getting old, need a change, and you can change DIY bars as much as you want! A suggestion might be using Carob instead o chocolate, it is a bit healthier, but the main reason is it has a higher melting point, so it won’t mess up your hands i you are on a hot ride or store the bars in your jersey.
Excellent Suggestion!
How about the storage of this bar, does it need to be refrigerated or if it is sealed (vacuumed) can it be stored at room temperature?
Thanks for the inspiration, made my first batch 😬 so much tastier than gels etc.
I am going to try this, Chris! thank you for the blog post. I am so sick of gummies and gels and every other vile option on the market. I love the idea of making my own. I am a vegan cyclist, too, and your recipe is perfect for that requirement!